Find out how the choose the size for a unisex garment with a Raglan sleeve.
Credit: blocks devised by Kathleen Kinder
Design feature of the raglan
The design feature of the raglan is the appearance of the raglan diagonals. These should not be obscured by a complicated textured pattern. Fair Isle bands however go well with them.
You can have multiple, cabled or lacy decreases (and increases as in the all-in-one raglan sweater), but the simplest and most striking is when the shaping takes place 2, 3, 4 or more stitches in from the edge.
This design also forms the basis for the raglan saddle shoulder and the full circular yoked sweater.
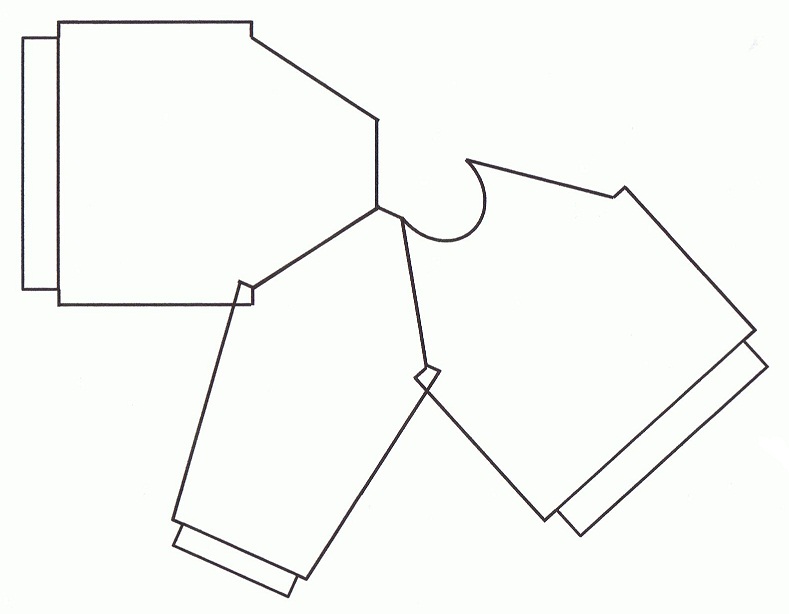
Using the diagrams

To show how the raglan design relates to the measurements of a fitted sleeve garment the latter shape is shown by a dotted black line in Figure 1.
The Back/front diagram on the left is a 2 dimensional drawing as so cannot show the whole garment. In this view of the Front you see only half the armhole.
The diagram on the right shows the whole sleeve. The sleeve head FVF is the complete sleeve top, half of it contributes to the depth of the front neck (which is why the front neck level is raised a little above the black dotted line). The other half adds to the back neck line.
Standard measurements and sizing for this style can be found here.
Optional sleeve cut out
On smaller sizes there is no problem of “poking top edge” raglan seam joins but it may well be noticeable on the larger sizes. See Figure 2.
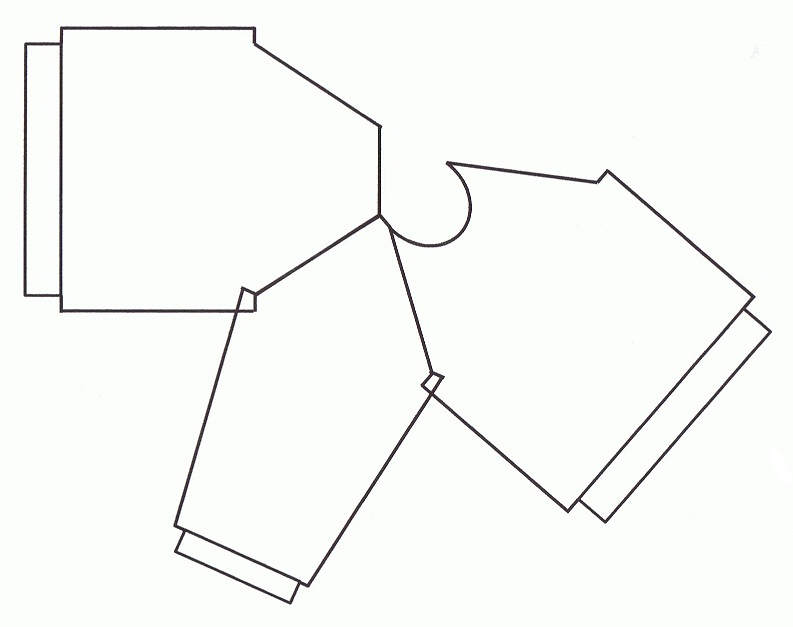
The optional sleeve top cuts out (shown on the far right for Figure 1) avoids the problem. See shape in Figure 3.
A simple approach is to abandon the balanced raglan decreases about 2-3cm from the top. Cast off 2 sts at the beginning of next and following 2 alternate rows. Continue straight until the row depth is achieved, leaving enough stitches on the other side for a back seam that should not poke below the neck band.
A good idea is to draft out the basic raglan in the size you want on large sheet of paper. Then you will see what the problem is on the back neck and raglan seam.
Alternatively, try knitting a child’s size first to get a hands-on understanding of the shape you are knitting.